How to Beat the Bosses of Castlevania

This is Castlevania. Often looked upon fondly for its classic horror theme, enjoyable gameplay and memorable soundtrack, it’s a game that continues to stand tall among its peers from the eight-bit era. It’s also sometimes known for another thing: its difficulty. Not only do its stages feature dangerous, tense situations, but they often culminate in some of the most stress-inducing boss battles of the era. The goal of this article (and complementary video) is to help players with these specific parts--the bosses of Castlevania.
Make no mistake, Castlevania is a difficult game, but new players may not be aware of specific strategies that can make its boss encounters significantly easier. If you’ve never beaten the game and struggle with many of these fights, you'll find lots of useful strategies here to help you succeed on your journey. For more intermediate players that are comfortable enough with the game but haven’t played in a while, stick around for a refresher, along with new strategies you may not be familiar with. Even expert players may find some useful bits of information here.
So with that, let’s take a look at the various strategies, one boss at a time.
Stage 1 - The Bat

Castlevania’s first boss is typically a pushover even for first-time players, but it’s still enjoyable diving into the various ways of defeating it. The most obvious way to deal damage here is to wield the axe, dropped right before the boss fight. It covers a lot of horizontal and vertical screen space and it helps to deal with the bat’s tendency to stay higher up on the screen. Just remember to attack the rightmost block at the start of the fight to pick up the double-shot, a power-up that lets you throw two axes back to back.
A more advanced strategy is to use the stopwatch. This item can be handy at many different points in Castlevania, but it’s particularly useful on the first two bosses where it can freeze them in place. You have to ensure the bat is low and close enough to make this work, but with properly timed uses, you can keep the boss locked into place for the entire fight. Constantly mash up and attack during the freeze time to ensure you use the watch again the moment it becomes available, keeping the bat frozen in place.
Going beyond the watch is the fire bomb, or holy water as it’s known in later games. This requires placement somewhere on the rightmost platforms, but with the bat’s tendency to dive towards the player, dishing out damage is actually pretty consistent and easy to pull off. With the double-shot in hand you can keep the boss stun-locked for the entire fight.
Fighting this boss whip-only, or even with just the dagger in hand, requires you to play more conservatively. Wait for the bat to get near the middle of the screen and perform a forward jumping attack from the rightmost platforms. Constantly keep an eye out for the bat’s positioning, as you do not want to be jumping in its direction as it dives towards you.
Stage 2 - Queen Medusa

Medusa is another fight first time players typically don’t have issue with. Even if a player dies here, the holy water and double-shot are available in the lead-up to the fight, allowing the player to be upgraded enough to make this boss a breeze even on a failed first attempt. Simply drop holy water where the boss appears and watch its health deplete rapidly.
If you manage to make it to the boss with the watch, you can also keep medusa locked for the entire fight. Unfortunately, this is the last time in the game the stop watch is useful against a boss, so enjoy it while it lasts.
The difficulty of this encounter ramps up significantly if you decide to use more conventional methods, requiring you to know the flow of the battle. At the start of the fight, immediately book it to the rightmost platform. As medusa gets close, jump over to the left. Deal with any snakes by standing and whipping--there’s no need to duck thanks to the morning star’s large hitbox. Medusa also likes to hover at one of two levels near the bottom of the screen. At its lowest point you can jump over it, so watch it closely and as it approaches, jump back over once again.
The boomerang is by far the most useful of the traditional projectile weapons here, but each weapon still requires you to follow the initial pattern closely if you want to finish the fight while taking minimal damage.
Stage 3 - The Mummies
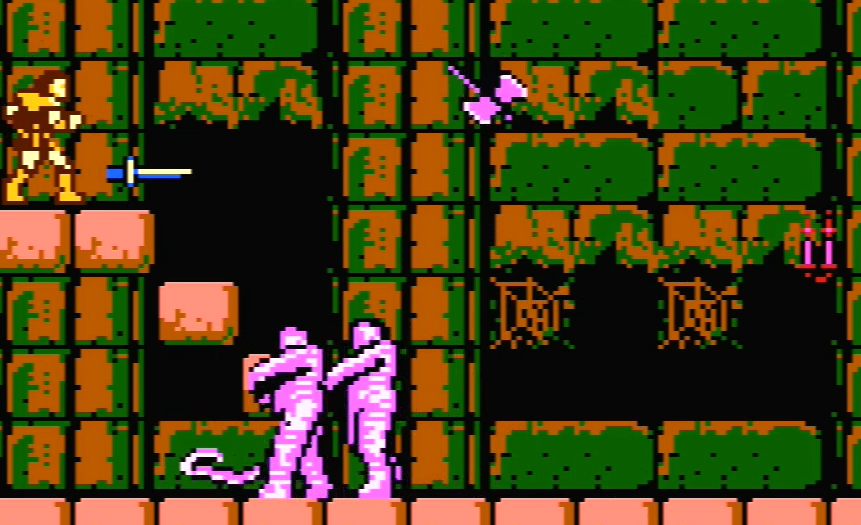
The mummies lay host to an interesting fight that I find many people make more difficult on themselves than necessary. While the left and right movement of the boss is erratic and their projectiles can be tough to deal with, there’s actually no reason to fight them head on. At the start of the fight, simply jump back on the platforms you came from and whack them in the head with the morning star, taking advantage of its massive hitbox. You will have to occasionally jump up further to avoid being touched by either mummies' head, but just wait for them to walk back over to the right and begin attacking them again.
Of course, if you have made it here with the holy water, the fight is made even easier. Simply drop these projectiles from the upper platforms and quickly call it a day.
If for some reason you grab the hidden health here and can’t get back up top, the boomerang is the best way to deal with these guys face to face. This is especially true if you can manage to get to one side or the other rather than being pinned in the middle.
Neither the stopwatch, axe or dagger are particularly useful here, so don’t bother.
Stage 4 - Frankenstein & Igor
Stage 4 in general along with Frankenstein & Igor is where the game really sees a considerable difficulty spike. One of the reasons for this is thanks in part to something I haven’t touched on yet: The dreaded Game Over screen. At any point you lose all of your lives, you get sent back to the very beginning of the stage. This is the most frustrating on Stage 4 where the trek to the boss is littered with loads of death-ridden water pits, surprise merman and bats that can knock you off platforms and ledges. All this culminates in one of the most difficult bosses in the game, and it’s often times here that players give up.
There isn’t a single surefire “easy” strategy to this fight, but your best bet is making it to the boss with the holy water in hand. Drop it on Frankenstein as soon as the fight starts while whipping in between to do maximum damage. If you miss or don’t get the timing right, Frankenstein will begin moving and Igor will bounce around the arena. The enemy health bar is depleted by hitting Frankenstein himself, but Igor can also be stunned by attacking him. Note that Igor cannot be hit again until his stun period ends, forcing you to time your attacks on him appropriately.
If you die at this fight without receiving a game over, your only recourse is to tackle it with the dagger, the only sub-weapon to appear at this checkpoint. While the dagger allows you to keep distance, it’s actually more effective to stay closer to Frankenstein, whipping him aggressively while also watching Igor’s jumps and projectiles. You will need to have some fancy footwork here to get through the fight, but if you can do it, it’s pretty satisfying.
You’re unlikely to get to Frankenstein & Igor with a boomerang or axe, as neither weapon appears in this level normally. However, you can occasionally get them as random drops. If you find yourself here with either of them, they can both be pretty useful by letting you keep a distance, deal with Igor’s projectiles and keep him stunned more often than not. The boomerang in particular seems to do big damage when used properly and is the easiest of the traditional three projectiles to use here.
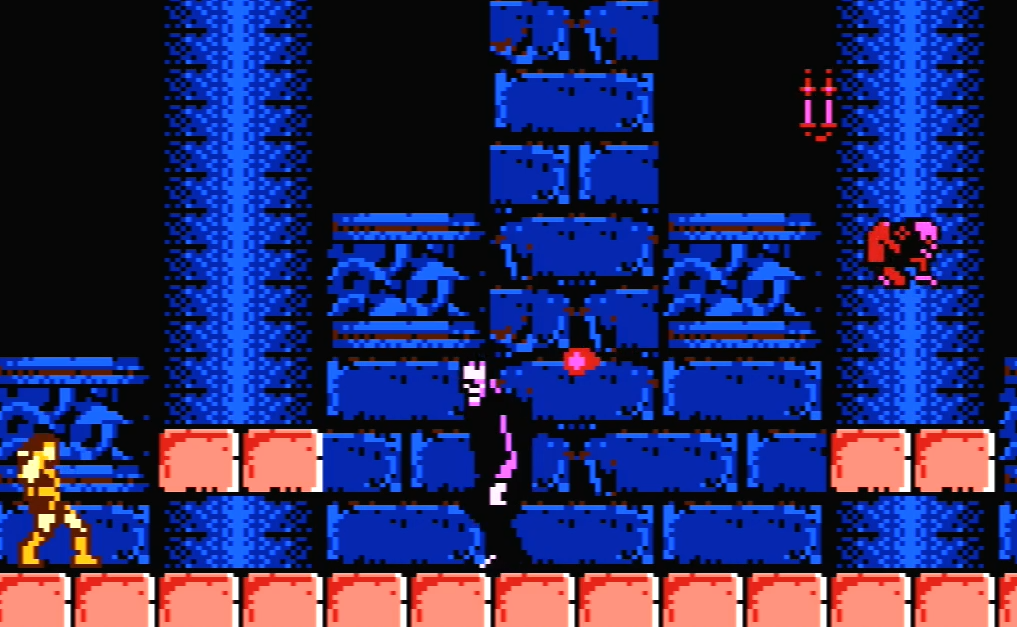
Stage 5 - The Grim Reaper

Easily the most difficult battle in Castlevania, Stage 5’s Grim Reaper is an unpredictable and erratic fight. Preceded by one of the most infamous hallways in all of classic gaming, players will often times find themselves shaken up before they even make it to the boss. The fortunate thing is that you can simply use the holy water to breeze past this boss. Drop it on the rightmost platform at the start of the fight and continue to do so until the boss is defeated. If for some reason you die, upon receiving a game over there will be a holy water drop from a candle in the very first room of this stage.
Fighting this boss with any other weapon combination is where things start to go downhill. Death is massive and likes to fly around the screen in a fairly inconsistent manner. Sickles also appear at various locations, often times specifically targeting the player. While attacking death is an obvious goal, it’s usually best to focus on getting rid of the sickles first, otherwise they will stack in numbers and become too overwhelming.
The dagger isn’t the most useful at this fight and is generally best avoided here, but both the boomerang and axe are a step up when paired with a double or triple shot. The boomerang in particular is great for doing multiple hits with one shot while also clearing out some sickles in the process.
Ultimately this fight is all about multi-tasking. You have to focus not just on Death’s trajectory, but where the sickles appear and the direction they are moving as well. Keep in mind that if you are playing an early version of Castlevania, the game can crash if too much is happening on screen at once. This is most-likely to occur at the Grim Reaper with a triple-shot boomerang setup. It actually happened to me multiple times in my practice sessions for this article and video.
Stage 6 - The Count

Castlevania’s finale features the most lengthy boss fight in the entire game. While I don’t consider it to be as outright challenging as Frankenstein or the Grim Reaper, it does end up being the greatest test of endurance compared to any other fight in the game. The pressure to succeed isn’t quite as great either, thanks to this being the only part of the game where receiving a game over doesn’t send you all the way back to the beginning of the stage. Instead, you respawn at the bottom of Dracula’s stairwell.
The fight with Count Dracula comes in two phases. In the first phase he appears in vampire form and teleports around the screen at random. When he momentarily appears he will quickly shoot a spread of projectiles towards the player before disappearing once again. In this phase his head is the only weak spot and the window of opportunity to hit is small.
Dracula’s teleportation is completely random and so it’s important to remain in constant motion during this fight. His fireballs can also track the player in the air, so it’s best to stand on the ground, wait for the fireballs to appear horizontally, then jump and attack. Being moderately close to Dracula when he appears will help you successfully clear the fireballs while also making contact with the whip. If Dracula appears too far away and you think you may not be able to jump over his fireballs, you can destroy them with your whip or boomerang.
Dracula’s first phase can be tedious, but it’s possible to speed up the process by timing two attacks back to back. It’s difficult to get consistently due to Dracula’s erratic teleportation, but with the boomerang you can often get some extra hits on top. Other sub-weapons aren’t particularly useful on this first phase, nor are you likely to have them for this fight, so it’s best to stick a basic whip and/or boomerang strategy here.
..But Wait, There’s More.

Phase 2 sees Dracula turn into beast form. In this phase, it hops from one side of the screen to the other, while occasionally lifting its arms to throw projectiles your way. Its projectiles fire out in a similar spread pattern as his first form, and if timed properly, they can be destroyed with a single attack. Its short jumps can’t be passed under, but occasionally it will soar high into the air. When timed right you can pass under this safely. Interestingly, it’s actually possible to trigger this high jump by simply ducking in front. It’s important to utilize this trick during those instances where you are completely cornered and are bound to take damage.
While the boomerang is useful against Dracula’s first form, the holy water available in the far left candle proves most useful during his second form. This will stun the beast in place for a short moment, allowing you to attack his weak spot--his head--rapidly.
If you die at this fight you won’t have many hearts to work with upon revival. A good trick to take advantage of here is walking up and down the stairs repeatedly. Each time you do so the candles on the upper floor reappear, allowing you to gain more ammunition for this fight. Don’t worry about the timer, as the game gives you plenty to work with on this fight.
It’s also possible to make a double or triple-shot appear by destroying Dracula’s fireballs as long as you have enough hearts in your inventory. This can make life a lot easier on the second form where you can keep Dracula completely stun-locked for the entire fight.
Finale

So with that, you should now have a good (or better) idea on how to take out the bosses of the original Castlevania. If you found it useful in any way, please help spread the word and share it with other like-minded classic gaming fans that may be struggling with the game.
For those that need more of a visual aid to go along with this text, check out the video version of this guide, here: